After a lot of help from other blogs and links on the web, I come up with a simple "how to configure reliance netconnect on fedora10 for dummies "
1. Check that your usb device has been detected by the kernel. For this on the command line
execute the following
[athatte@localhost ~]$: dmesg | grep usb
The output is something like this
[athatte@localhost ~]$ dmesg | grep usb
usbcore: registered new interface driver usbfs
usbcore: registered new interface driver hub
usbcore: registered new device driver usb
usb usb1: configuration #1 chosen from 1 choice
usb usb1: New USB device found, idVendor=1d6b, idProduct=0002
usb usb1: New USB device strings: Mfr=3, Product=2, SerialNumber=1
usb usb1: Product: EHCI Host Controller
usb usb1: Manufacturer: Linux 2.6.27.30-170.2.82.fc10.i686 ehci_hcd
usb usb1: SerialNumber: 0000:00:0b.1
usb usb2: configuration #1 chosen from 1 choice
usb usb2: New USB device found, idVendor=1d6b, idProduct=0001
usb usb2: New USB device strings: Mfr=3, Product=2, SerialNumber=1
usb usb2: Product: OHCI Host Controller
usb usb2: Manufacturer: Linux 2.6.27.30-170.2.82.fc10.i686 ohci_hcd
usb usb2: SerialNumber: 0000:00:0b.0
usbcore: registered new interface driver hiddev
usbcore: registered new interface driver usbhid
usbhid: v2.6:USB HID core driver
SELinux: initialized (dev usbfs, type usbfs), uses genfs_contexts
usb 2-3: new full speed USB device using ohci_hcd and address 2
usb 2-3: configuration #1 chosen from 1 choice
usb 2-3: New USB device found, idVendor=12d1, idProduct=1412
usb 2-3: New USB device strings: Mfr=1, Product=2, SerialNumber=4
usb 2-3: Product: HUAWEI Mobile
usb 2-3: Manufacturer: HUA�WEI TECHNOLOGIES
usb 2-3: SerialNumber: �������������������
usb 2-3: USB disconnect, address 2
usb-storage: device found at 2
usb-storage: waiting for device to settle before scanning
usbcore: registered new interface driver usb-storage
usb 2-3: new full speed USB device using ohci_hcd and address 3
usb 2-3: configuration #1 chosen from 1 choice
usb-storage: probe of 2-3:1.0 failed with error -5
usb-storage: probe of 2-3:1.1 failed with error -5
usb-storage: probe of 2-3:1.2 failed with error -5
usb-storage: device found at 3
usb-storage: waiting for device to settle before scanning
usb-storage: probe of 2-3:1.4 failed with error -5
usb 2-3: New USB device found, idVendor=12d1, idProduct=1412
usb 2-3: New USB device strings: Mfr=1, Product=2, SerialNumber=4
usb 2-3: Product: HUAWEI Mobile
usb 2-3: Manufacturer: HUA�WEI TECHNOLOGIES
usb 2-3: SerialNumber: �������������������
usbcore: registered new interface driver usbserial
usbserial: USB Serial support registered for generic
usbcore: registered new interface driver usbserial_generic
usbserial: USB Serial Driver core
usbserial: USB Serial support registered for GSM modem (1-port)
usb 2-3: GSM modem (1-port) converter now attached to ttyUSB0
usb 2-3: GSM modem (1-port) converter now attached to ttyUSB1
usb 2-3: GSM modem (1-port) converter now attached to ttyUSB2
usb 2-3: GSM modem (1-port) converter now attached to ttyUSB3
usbcore: registered new interface driver option
usb-storage: device scan complete
The "usb 2-3 : Manufacturer: HUA�WEI TECHNOLOGIES" - is the usb device for reliance netconnect.
It means the device has been detected.
2. Next up, execute the following
[athatte@localhost ~]$ sudo emacs /etc/wvdial.conf
This commands opens the wvdial.conf file which is initially a read-only file. You need to have root permissions to access and edit this file. Paste the following in the file
[Dialer Defaults]
Init1 = ATZ
Init2 = ATQ0 V1 E1 S0=0 &C1 &D2 +FCLASS=0
Modem Type = Analog Modem
Baud = 9600
New PPPD = yes
Modem = /dev/ttyUSB0
ISDN = 0
[Dialer netconnect]
Username = ( The number assigned to you - something like 9371XXXXXX)
Password = ( The number assigned to you - something like 9371XXXXXX)
Phone = #777
Stupid Mode = 1
Inherits = Modem0
3. You can try connecting using the following command - " sudo wvdial netconnect" and see the connecting procedure being executed on the shell, but may not be able to access any pages via
the browser. During this procedure you will come across the following details
primary DNS address 202.137.97.193
--> pppd: ��\[08]��\[08]��\[08]
--> secondary DNS address 202.137.96.2
Disconnect, after this since you wont be able to access web pages.
4. After this, the last step is to modify the /etc/resolv.conf file. Execute the command [athatte@localhost ~]$ sudo emacs /etc/resolv.conf
Add the following entries to the resolve.conf file. Use the data from the previous step (3)
nameserver 202.137.97.193
nameserver 202.137.96.2
5. Connect once again by executing the command in step 3 and try accessing a webpage via the browser. You should be good by now.
References :
http://linuxondesktop.blogspot.com/2009/07/configuring-reliance-netconnect-on.html
http://www.hasanen.com/?p=25
http://peeths-workspace.blogspot.com/2009/04/reliance-netconnect-usb-card-on-linux.html
http://anshprat.wordpress.com/2008/12/16/reliance-datacardusb-modem-ec-121-on-linux-fedora-10/
Wednesday, September 9, 2009
Friday, February 8, 2008
BarCampPune4 : Getting Bigger and Bigger !

BarCamp is an ad-hoc gathering born from the desire for people to share and learn in an open environment. It is an intense event with discussions, demos, and interaction from attendees.
BarCamp is back to Pune, India this February 2008 . The geeks have been awaiting for this event for a while and now this time its getting even bigger.
For more information visit www.barcamp.org/BarCampPune4 and register NOW !!
Other links -www.barcamppune.blogspot.com
Tuesday, December 4, 2007
Windows PowerShell walkthrough !!
Windows Powershell is the new command line utility targeted for system administrators and developers. Its can be used with Windows 2003 Server , XP SP2 , Vista and the Windows 2008 Server.
The implementation of the powershell is really unique , unlike other shells, which accept and return text. Powershell is built on top of the .NET (CLR) accepting and returning .NET objects.This fundamental implementation brings about new methods to the management and configuration of Windows.
The early implementations of shells like cmd.exe , KSH , CSH and BASH Unix shells , operated using a command utility in a new process and returned results in the form of text. The Powershell uses .NET objects ( cmdlets) pronounced as "command-lets". So , it doesnt process text , but processes objects based on the .NET platform.
Powershell incorporates functionalities like accessing data stores like the registry , file system , certificate signatures etc.
It allows loads of other dimensions like managing profiles , using Windows programs , customizing powershell , support for scripting , managing errors etc.
Now we shall look at a few "common user functions" that the powershell offers rather than looking at how we interact with the .NET objects.
Essentially it has a few commands similar to the UNIX shell like the "clear" , "man" for clearing the screen and accessing manual pages respectively.
Lets have a look at some basic functions :
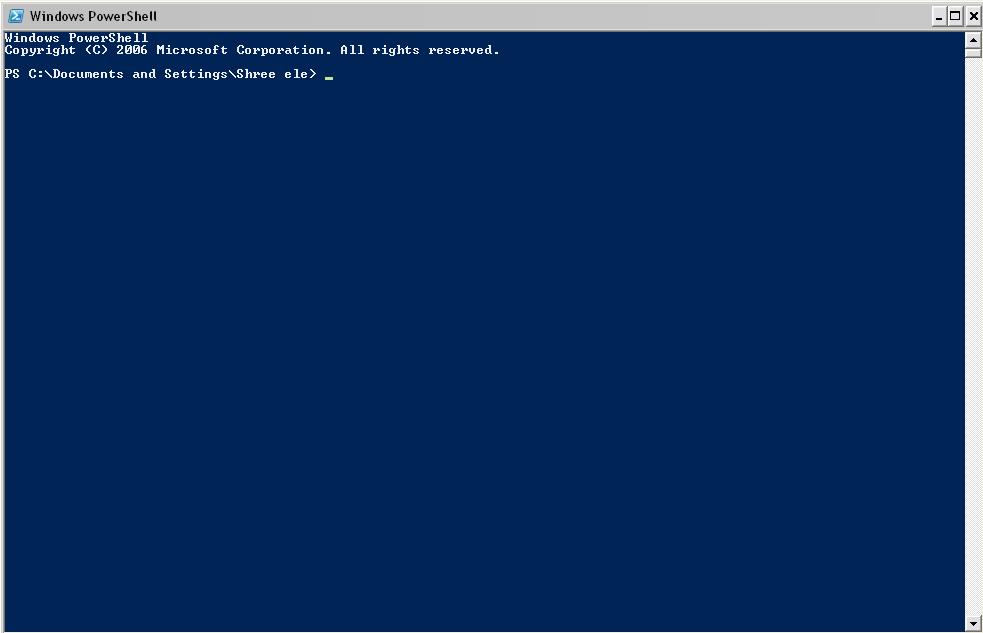
This is how the powershell will look on running powershell.exe

1. To obtain the current system date type PS C:\get-date
PS C:\man get-date ( allows to view format for using cmdlet)

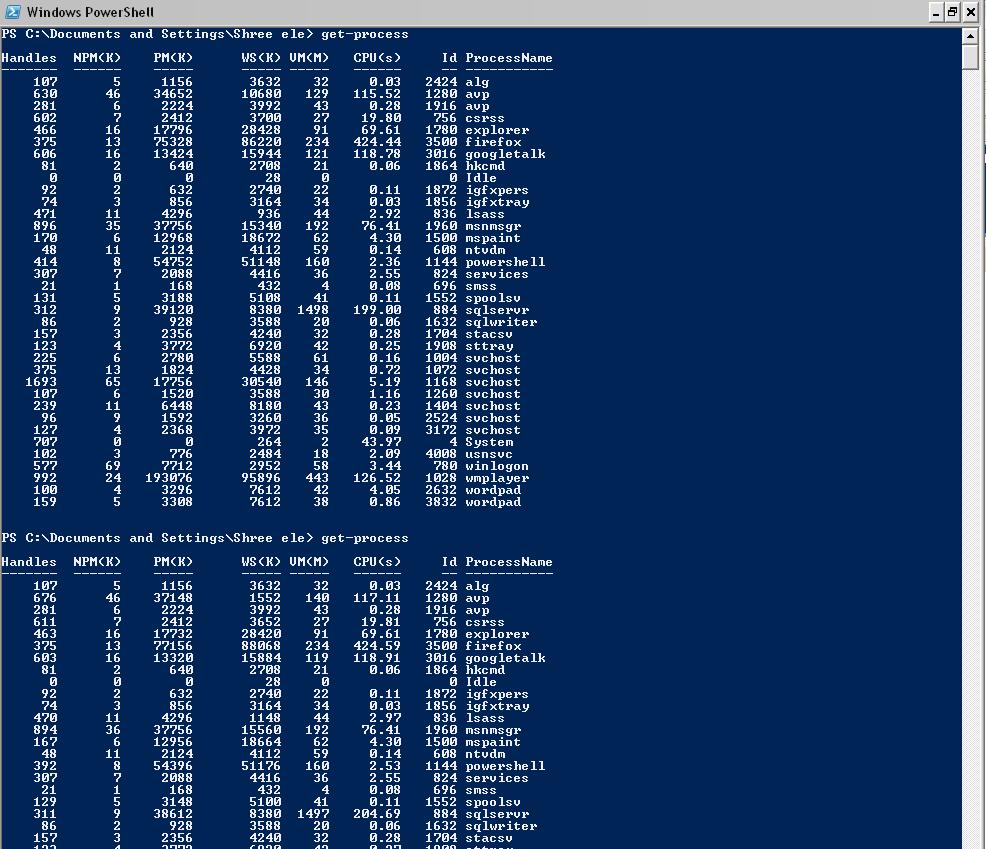
2. PS C:\ get-process ( allows to view currently running processes )

3. PS C:\ get-service (allows to view status of windows services)
 Now lets interact on "aspnet_state" service circled above. This service is currently STOPPED.
To make sure this is running we can "start" this service using the command
PS C:\ start-service aspnet_state
PS C:\ get-service

We shall now try stopping the "aspnet_state" again

4. PS C:\ man ( lists all the alias , cmdlets , help files , providers etc )


These were a few examples of what the Powershell offers to an "advanced" user who has the credentials of configuring and managing the Operating System.
The powershell is an easy to use and powerful mechanism of managing the operating system , following an easy syntax and has loads to offer in terms of management and development.
So , download the powershell & manuals and be powered to manage your OS.
We will see more functionalities in the upcoming posts , thank you :)
References : Powershell manual , MSDN
The implementation of the powershell is really unique , unlike other shells, which accept and return text. Powershell is built on top of the .NET (CLR) accepting and returning .NET objects.This fundamental implementation brings about new methods to the management and configuration of Windows.
The early implementations of shells like cmd.exe , KSH , CSH and BASH Unix shells , operated using a command utility in a new process and returned results in the form of text. The Powershell uses .NET objects ( cmdlets) pronounced as "command-lets". So , it doesnt process text , but processes objects based on the .NET platform.
Powershell incorporates functionalities like accessing data stores like the registry , file system , certificate signatures etc.
It allows loads of other dimensions like managing profiles , using Windows programs , customizing powershell , support for scripting , managing errors etc.
Now we shall look at a few "common user functions" that the powershell offers rather than looking at how we interact with the .NET objects.
Essentially it has a few commands similar to the UNIX shell like the "clear" , "man" for clearing the screen and accessing manual pages respectively.
Lets have a look at some basic functions :
This is how the powershell will look on running powershell.exe
1. To obtain the current system date type PS C:\get-date
PS C:\man get-date ( allows to view format for using cmdlet)

2. PS C:\ get-process ( allows to view currently running processes )
3. PS C:\ get-service (allows to view status of windows services)
 Now lets interact on "aspnet_state" service circled above. This service is currently STOPPED.
To make sure this is running we can "start" this service using the command
PS C:\ start-service aspnet_state
PS C:\ get-service

We shall now try stopping the "aspnet_state" again

4. PS C:\ man ( lists all the alias , cmdlets , help files , providers etc )


These were a few examples of what the Powershell offers to an "advanced" user who has the credentials of configuring and managing the Operating System.
The powershell is an easy to use and powerful mechanism of managing the operating system , following an easy syntax and has loads to offer in terms of management and development.
So , download the powershell & manuals and be powered to manage your OS.
We will see more functionalities in the upcoming posts , thank you :)
References : Powershell manual , MSDN
Wednesday, October 31, 2007
Installing lex and yacc on Ubuntu 6.10 !
An easy tutorial on installing lex and yacc tools on Ubuntu 6.10.
This is targeting an audience who would like to install the above compiler tools without having the aid of an ubuntu cd-rom , and for those who have not installed all the packages during installation.The lex and yacc are compiler construction tools and are referred to as "flex" and "bison" packages respectively for Ubuntu.
First and foremost to check if lex and yacc are already present on your Ubuntu , click on the terminal and type the following
galacticosfan@galacticosfan:~$ which lex
galacticosfan@galacticosfan:~$ which yacc
If lex and yacc are already present , you will be notified by a message
" /usr/bin/lex" and " /usr/bin/yacc".
If such messages are not received , it would indicate that the tools are absent.
Simple guidelines to install "flex" and "bison" for Ubuntu :
1. Go to System---->Administration----> Synaptic Package Manager
Search for the "flex" package.

Apply mark for installation and click on "Apply" on the toolbar in the Synaptic Package Manager.
Similarly search for "bison" and mark for installation as shown

On applying changes you would come across the following screen
 On applying changes the Operating system sets up flex and bison.
Now to confirm that flex and bison have been setup , go to the
terminal and type "which lex" and "which yacc"

The /usr/bin/lex shows that the flex tool has been setup,showing the same for yacc as well.
Alternatively u can install the above tools by issue the following commands
galacticosfan@galacticosfan:~$ sudo apt-get install flex
galacticosfan@galacticosfan:~$ sudo apt-get install bison
The tools will be installed automatically .
Saturday, August 18, 2007
Google gears !!
Google gears is an open source browser extension that allows developers to build web applications which can work offline.
It is a cross platform plugin helping developers to build content that can work offline as well as online. It primarily uses JavaScript API's .
A light weight 700k installer which binds 3 API's together.
1.Local server - to cache the data , images , javascript locally
2.A database based on SQLite - a relational database to search data
3.Asynchronous Javascript - to handle synchronisation between the offline and online content and preventing the browser from overburdening itself.
The currently google geared enabled product is the "Google Reader"and there are a few more to come .
Works on Windows , MAC , Linux and requires Internet explorer 6 > and Firefox 1.5 >
Looks like a stiff competition to MS Silverlight and co. Lets see what happens ....
A technical know how to google gears : Googlegears Slide
Friday, August 3, 2007
Microsoft Silverlight : Getting Started
Well yet another "FAT " platform by Microsoft :) . Well , this one is called the "$ilverlight " . I'll try making this short and sweet just like the previous posts.
Bang !! Silverlight is a Cross platform , cross browser application(plugin) to deliver Rich Internet Applications and rich media which enhances UX ( user experience ).
You can find most of the information on www.silverlight.net.
The following slide gives a short introduction on Silverlight and its implementation.
Requirements to develop Silverlight applications :
1. Runtimes - Silverlight Alpha / Beta
2. Developer environment - MS Visual Studio 2008 Beta 2 , Silverlight Add-ons
3. Designer environments - Expression Design , Expression Blend , Media Encoder
Monday, July 23, 2007
Installing IIS in Vista
The installation of the IIS on Windows Vista isnt the same like the one on Win XP or Win 2000.
At first the user may think the service isnt provided but the components are kind of hidden.
To install IIS and other services on Vista follow the steps :
1. Start menu ---> Control Panel
2. Click on Programs
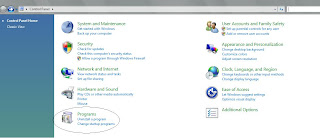
3. Programs and Features
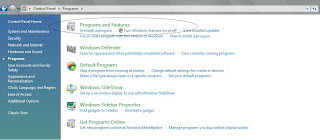
4.Click on "Turn Windows features on or off"
A new Windows features window will open and you can then select the particular component that needs to be installed :)
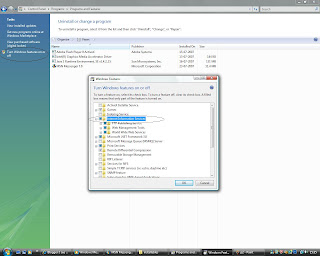
The user doesnt need to insert any cd while installing the component as was the case in Win XP(add / remove new components )
Subscribe to:
Comments (Atom)
